Sunday, 26 December 2010

Things to do next year…!

Well its almost the end of another year – and i’ve been thinking that next year i would like to “artistically” push myself, i’m hoping to do a 365 day project that would involve blogging every day either a picture (drawing, painting, digital work, Photo manipulation) or write some sort of nonsense :)  The last few months i’ve not blogged much this is mainly because i’ve been busy doing other paid work and although i really hope this continues next year i plan to make sure i do this every day too :)

Okay granted – some days i will be away from the computer and not have access so this will mean i will have to either go back and blog into the past or post a few things on one days to make up for it! :D  i’ll probably mark each entry for the 365 thing as #365days which if you are on twitter will know is a hash tag :D

but all in all i just wanted to say thanks for reading my crap and looking at my art :D  please feel free to contact me or leave messages on my blog – its always nice to hear from people :D 

Hope you all have a happy new year (2011) :)

sig

Sunday, 19 December 2010

Orange segments

orange segments

Acrylics on canvas board, 5”x7”

I found the orange hues very hard to mix and get right.

Saturday, 11 December 2010

1/2 apple

half an apple

Acrylics on canvas board, 5”x7”

Thursday, 9 December 2010

Banana Split

banana split

Acrylics on Canvas Board, 7”x5”

Wednesday, 8 December 2010

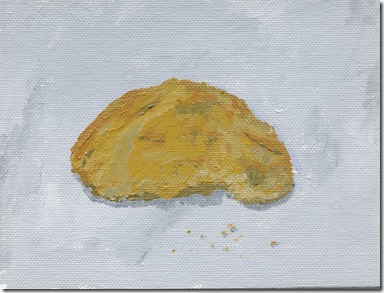
Oat cookie

oat cookie

Acrylics, Still life on canvas board 5”x7”

Tuesday, 7 December 2010

Cup and spoon

cup and spoon

Acrylics on paper 7”x10”

Thursday, 2 December 2010

Famous zombies in history – Abraham Lincoln

Abraham_Lincoln

without beard and some skin :D

Wednesday, 1 December 2010

Banana on Cloth

banana on cloth

Still life, Acrylics on Paper 7”x10”

Stripy Text...!

More text antics with Photoshop. We shall try and create this...

final

Step 1.

Start by creating a new Photoshop Document, I used 1024x768 at 72 ppi, but as always its really up to you. I then set my background Colour to Red #c0292f, you can either just fill the Background Layer with red or create a new Layer and colour that red.

step1

Step 2.

Next reset the Swatches to default by pressing D on your keyboard, follow this by pressing X to swap the foreground and background and make White the foreground colour. Choose the Text Tool and select the font Impact (or anything else big and bold), set the size to 150. Type something on on your screen.

step2

Step 3.

We are now going to add some Layer Styles to our text, you can do this by going to Layer > Layer Style > or by pressing the fx button on the bottom of the Layer Palette. First Choose the Bevel and Emboss style and perform the following actions (most of them are the default styles)

click for big

Set the Gloss Contour to the preset Ring(bottom row, 2nd in)

click for big

Next add a Inner Glow, Stroke

click for big

click for big

Finally add a Gradient Overlay as in the picture

click for big

finally reduce the Fill Opacity of the Layer to 24%

step3f

Step 4.

Next we are going to add a new Layer above the Text Layer and fill it with clouds by going to Filter > Render > Clouds. This will generate a random selection of cloud like texture over the picture. Next we want to put a selection around the Text, you can easily do this by holding the Control Key on your Keyboard and clicking the Text Layer. Now making sure you are on your clouds Layer create a new Layer Mask. Layer > Layer Mask > Reveal Selection. Finally reduce the Fill opacity to 30%.

step4

Step 5.

We want to now use the Line tool, set the size to 50 pixels and draw a series of lines across the text as in the picture below...

step5

Step 6

Select all of your stripes layers in the Layer Palette (hold control and click once on each one) and the clip them to the Clouds Layer, Layer > Create Clipping Layer.

You can now put things under the text and they will show through...

step6

Hope you enjoyed this tutorial :)

please look out for me on twitter @revjesse and say hello also have a look at my website http://www.simonrudd.info

Tuesday, 30 November 2010

Sunday, 28 November 2010

Stripy Text Tutorial…

final

Well this isn't the tutorial – that’ll be posted in a few days time :D  keep your eyes peeled :D

Wednesday, 24 November 2010

Piggy…!

on a hill a piggy wig stood digital 1

I’ve not had a lot of time for actual paint work today – so I’ve decided to paint a bit digitally – hopefully i will do both in the end but digital will be faster.   Also my water colour was mentioned by Stevyn Colgan on his blog http://toatp.blogspot.com/ :)

Monday, 22 November 2010

Piggy WIP

pig

Work in progress, Watercolours on paper. 

On a hill a piggywig stood…!

on a hill a piggy wig stood

inspired by @stevyncolgan ‘s painting of the owl and the pussycat

Saturday, 20 November 2010

Art Swap

dr pilgrim 72 ppi

This was my entry for Art Swap…!

Friday, 19 November 2010

News paper article…

the sun 18th nov 2010 small
On Thursday the 18th November, 2010 i was in the Sun News Paper :)

Thursday, 11 November 2010

Wednesday, 10 November 2010

Damien McGrath

damien

damien

Digital Painting

Tuesday, 9 November 2010

Karen Bright

karen

karen

Digital Painting of Karen Bright

Thursday, 4 November 2010

Monkey Nuts

monkey-nuts

Acrylics on paper 7”x10” :)

Wednesday, 3 November 2010

Exploding text (well sort of)

I'd like to continue my TS tutorials with a text effect I like, its fairly simple but looks effective.

Step 1.

We start by making a 1000x1000 pixel document – we have to have a square canvas because one of the later steps will scream and cry if we don't. Also set the background to black.

step1

Step 2.

Set your foreground colour to white and select the Text Tool, using the Arial font Write “BOOM” On your canvas. In the Layer Palette right click the Text Layer and select Rasterize Type, this will change the text into a Raster Layer so we can use filters on it.

step2

Step 3.

We now want to blur the Text, so go to Filter > Blur > Gaussian Blur and set the blur to 10 pixels.

step3

Step 4.

Next select Filter > Distort > Polar Coordinates setting the option to Polar to Rectangle. Follow this by rotating the Image 90 degrees clock wise (Image > Image Rotation 90 CW).

step4

Step 5.

Go to Filter > Stylize > Wind and set the Method to Wind, also direction from Right.

step5

 step5b

Step 6.

Now we want to reverse a couple of our steps – first we want to rotate the image 90 degrees Counter Clock Wise (Image > Image Rotation 90 CCW). Then we want to use the Polar Coordinates Filter again – but use Rectangle to Polar.

step6

Step 7.

With that done we add a Gradient Adjustment Layer, I chose the foreground to transparent gradient and set my foreground colour to Red. I also set the Gradient type to Radial, finally I set the Blending Mode to Overlay.

step7

Step 8.

Under the Gradient Adjustment Layer Make a new Layer called Smoke, Using the Elliptical Marquee Tool draw out a large Circle. Fill this Selection with Clouds – Filter > Render > Clouds. Next with the Selection still in place – blur the Selection as in step 3.

step8

Step 9.

Add a Layer Mask to the Smoke Layer and select the Gradient Tool and choose the Radial Gradient from the options, Set your Foreground colour to white and your background to black. Next on the Layer Mask Pull out a gradient from the centre of the circle to the outside – this will mask some of the “Smoke” leaving some at the centre :D

final

Find Me on Twitter at @revjesse or visit my website at http://www.simonrudd.info

Tuesday, 2 November 2010

Robot again!

robot-3

Another Photoshop painting :)

Saturday, 30 October 2010

Robot

Photoshop painting of a robot…!

I’ve been thinking of painting a Robot for my son for Christmas,  he loves all things like that and i think he would like it :)  so i’m putting a bit of practice in :)

Thursday, 28 October 2010

Foot!

56815_481770370890_528990890_7234841_4697577_o

I removed a couple of toes from my foot :D  not particularly gruesome but fun to make :D also in other news Adobe linked to my Severed arm tutorial on Face book yesterday :D  shame they didn't credit me :(

arm-tut-ps

Saturday, 23 October 2010

Monday, 18 October 2010

Comic style

gunther

Biro and acrylics on card – based on a panel from Preacher : Salvation